一、事件处理的重要性
能够对事件进行反应和处理是图形界面程序开发过程中最重要的任务之一,因为只有事件处理才能让一个图形界面程序拥有灵魂,否则,图形界面程序只是一副空皮囊,只能看不能用。
对PyQt熟悉的朋友应该知道,在QT中,事件的处理是通过信号槽来实现的。信号是事件的反映,槽函数则是对事件的处理。
在Tkinter中,某些部件类会通过command选项自动处理一些事件,比如Button按钮类中的command选项可以处理按钮点击时的事件。如下所示:
# coding:utf-8
# @文件: 5-1.py
# @创建者:州的先生
# 博客地址:zmister.com
# 主題:Button按鈕的最基礎事件處理

import tkinter as tk

class ButtonApp(tk.Tk):
    def __init__(self):
        super().__init__()
        self.wm_title("州的先生zmister.com Tkinter教程")
        button = tk.Button(
            text="按鈕事件",
            command = self.print_button
        )
        button.pack()

    def print_button(self):
        print("點擊了按鈕")

if __name__ == '__main__':
    app = ButtonApp()
    app.mainloop()
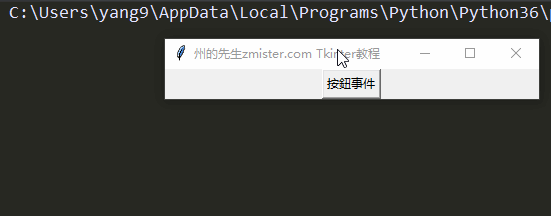
运行上述代码,我们会得到一个只要一个按钮的图形用户界面,点击按钮时,我们可以在控制台看到我们点击的操作,如下图所示:
这只是一些最原始的事件处理方法,如果需要更加复杂和高级的事件处理,那么就不能使用command选项来实现了。
面对更加复杂的事件处理,我们在Tkinter中使用部件类的bind()方法来实现。
二、bind()方法的简单介绍
bind()方法用于在小部件上绑定一个事件到一个函数上。(类似于PyQt中连接一个信号到一个槽函数上)
下面是bind()方法在源码中的定义和说明:
    def bind(self, sequence=None, func=None, add=None):
        """Bind to this widget at event SEQUENCE a call to function FUNC.

        SEQUENCE is a string of concatenated event
        patterns. An event pattern is of the form
        <MODIFIER-MODIFIER-TYPE-DETAIL> where MODIFIER is one
        of Control, Mod2, M2, Shift, Mod3, M3, Lock, Mod4, M4,
        Button1, B1, Mod5, M5 Button2, B2, Meta, M, Button3,
        B3, Alt, Button4, B4, Double, Button5, B5 Triple,
        Mod1, M1. TYPE is one of Activate, Enter, Map,
        ButtonPress, Button, Expose, Motion, ButtonRelease
        FocusIn, MouseWheel, Circulate, FocusOut, Property,
        Colormap, Gravity Reparent, Configure, KeyPress, Key,
        Unmap, Deactivate, KeyRelease Visibility, Destroy,
        Leave and DETAIL is the button number for ButtonPress,
        ButtonRelease and DETAIL is the Keysym for KeyPress and
        KeyRelease. Examples are
        <Control-Button-1> for pressing Control and mouse button 1 or
        <Alt-A> for pressing A and the Alt key (KeyPress can be omitted).
        An event pattern can also be a virtual event of the form
        <<AString>> where AString can be arbitrary. This
        event can be generated by event_generate.
        If events are concatenated they must appear shortly
        after each other.

        FUNC will be called if the event sequence occurs with an
        instance of Event as argument. If the return value of FUNC is
        "break" no further bound function is invoked.

        An additional boolean parameter ADD specifies whether FUNC will
        be called additionally to the other bound function or whether
        it will replace the previous function.

        Bind will return an identifier to allow deletion of the bound function with
        unbind without memory leak.

        If FUNC or SEQUENCE is omitted the bound function or list
        of bound events are returned."""

        return self._bind(('bind', self._w), sequence, func, add)
可以看到bind()方法在部件类中进行定义,并且其接受三个参数:
- sequence:事件的组合序列,用来修饰事件;
- func:回调函数;
- add:可选的参数,用于指定回调函数额外调用到另一个函数还是替换上一个函数
2.1事件序列
sequence是一个格式为:
<修饰符-事件类型-细节>
的字符串,其中:
- 修饰符用来修饰事件,为常规的单一事件设置组合事件,比如按下Shift键并鼠标右键单击等。修饰符有很多,而常用的修饰符有如下几个:
- Shift:当用户按下Shift键时;
- Alt:当用户按下Alt键时;
- Control:当用户按下Control键时;
- Lock:当用户按下Shift+Lock键时;
- Double:当事件快速发生两次时;
- Triple:当事件快速发生三次时;
- 事件类型用来指示具体的事件。事件类型有很多,本文只聚焦于最常见的鼠标事件和键盘事件,其他的事件大家可以触类旁通。常见的鼠标键盘事件有如下几个:
- Button:点击鼠标时生成的事件;
- ButtonPress:点击鼠标时生成的事件;
- Enter:鼠标移动到小部件上时生成的事件;
- Leave:鼠标离开小部件时生成的事件;
- Motion:鼠标移动时生成的事件;
- FocusIn:小部件获取到光标焦点时生成的事件;
- FocusOut:小部件失去光标焦点时生成的事件;
- Key:按下键盘时生成的事件;
- KeyPress:按下键盘时生成的事件;
- KeyRelease:松开键盘时生成的事件;
- 细节则用来指示具体的鼠标和键盘事件。对于鼠标事件而言,我们可以用1表示鼠标左键,2表示鼠标滚轮键,3表示鼠标右键;而对于键盘事件,其可以用来表示一些特殊键符,比如:Tab键、Esc键、方向键(up、down、left、right),Backspace键和其他的功能键,如F1到F12。
所以,我们可以用:
"<Button>"
表示笼统地表示一个鼠标点击事件;
可以用:
"<Button-1>"
表示鼠标左键单击事件;
可以用:
"<Double-Button-3>"
表示鼠标右键双击事件。
2.2 回调函数
bind()方法还得接收一个回调函数,只有有了回调函数,事件才能做出具体的响应。
在回调函数里面,其还接收一个事件参数,里面包含了事件的一些属性。对于鼠标事件,其有如下属性:
- x和y:表示鼠标当前的位置;
- x_root和y_root:表示鼠标基于屏幕左上角的当前位置;
- num:表示鼠标的按键号(1,2,3)
对于键盘事件,则有如下属性:
- keysym:表示按下的键位;
- keycode:表示按下键位的十进制ASCII码;
- char:表示输入的字符;
下面我们来看具体的鼠标键盘事件处理演示
三、基础的鼠标事件处理
我们创建一些图形界面程序,里面包含一个Frame部件和一个Button部件,并将鼠标在它们上进行的操作打印出来,代码如下所示:
# coding:utf-8
# @文件: 5-2.py
# @创建者:州的先生
# 博客地址:zmister.com
# bind方法處理鼠標事件

import tkinter as tk

class EventApp(tk.Tk):
    def __init__(self):
        super().__init__()
        self.wm_title("州的先生zmister.com Tkinter教程")
        button = tk.Button(text="按鈕",height=5,width=10) # 实例化一个按钮类
        frame = tk.Frame(bg="green",height=100,width=100) # 实例化一个Frame类

        frame.bind("<Enter>",self.print_mouse_status) # 鼠标进入小部件事件
        frame.bind("<Leave>",self.print_mouse_status) # 鼠标离开小部件事件
        frame.bind("<B1-Motion>",self.print_mouse_status) # 鼠标左键移动事件

        button.bind("<Button>",self.print_mouse_click) # 鼠标单击事件
        button.bind("<Double-Button-1>",self.print_double_click) # 鼠标左键双击事件

        frame.pack(padx=20,pady=20)
        button.pack(padx=20,pady=20)

    # 打印鼠标的状态和位置
    def print_mouse_status(self,event):
        print("鼠标状态:",event.type)
        print("鼠标位置:",event.x,event.y)

    # 打印单击的鼠标
    def print_mouse_click(self,event):
        key_dict = {1:'左',2:'中',3:'右'}
        print(event.type,"单击了鼠标{}键".format(key_dict[event.num]))

    # 打印双击的鼠标左键
    def print_double_click(self,event):
        print(event.type,"双击了鼠标左键")

if __name__ == '__main__':
    app = EventApp()
    app.mainloop()
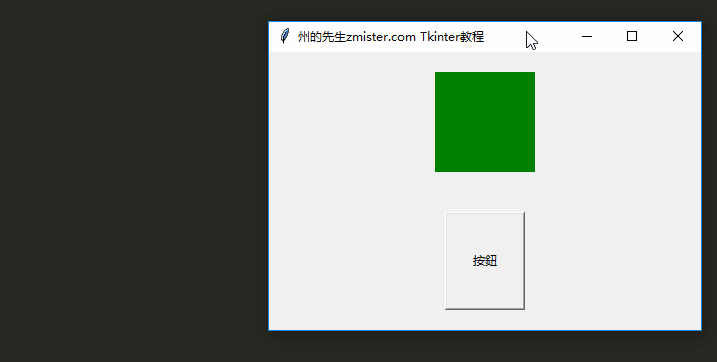
运行上述代码,我们将会对鼠标进入和离开Frame部件的状态进行捕获,对鼠标在Frame中单击移动的位置进行捕获,对鼠标单击按钮的事件进行捕获,对鼠标左键双击的事件进行捕获。其效果如下图所示:
四、基础的键盘事件处理
现在,我们创建一个包含两个Entry()文本输入小部件的图形界面程序,用来捕获键盘的输入事件。代码如下所示:
# coding:utf-8
# @文件: 5-3.py
# @创建者:州的先生
# 博客地址:zmister.com
# bind方法处理键盘事件

import tkinter as tk

class EventApp(tk.Tk):
    def __init__(self):
        super().__init__()
        self.wm_title("州的先生zmister.com Tkinter教程")
        entry = tk.Entry() # 实例化一个文本输入部件
        entry_non= tk.Entry()
        entry.bind("<FocusIn>", self.print_type) # 绑定获取光标焦点事件
        entry.bind("<FocusOut>",self.print_type) # 绑定失去光标焦点事件
        entry.bind("<Key>", self.print_key) # 绑定键盘输入
        entry.pack(padx=20, pady=20)
        entry_non.pack(padx=20, pady=20)

    def print_type(self, event):
        print(event.type)

    def print_key(self, event):
        keysym,keycode,char = event.keysym, event.keycode, event.char
        print("键位:{},ASCII码:{},字符:{}".format(keysym,keycode,char))

if __name__ == '__main__':
    app = EventApp()
    app.mainloop()
在上述代码中,我们对第一个文本输入小部件的光标获取与失去,以及其中输入的文本的内容进行了捕获,其效果如下图所示:

五、结语
在上面我们对Tkinter的bind()方法进行了一些简单的介绍,并通过对鼠标和键盘的事件处理演示了bind()方法的使用。通过这两个实例的演示,大家应该会对使用bind()方法进行事件处理有了基本的认识。至于更多类型的事件处理,还需要大家具体实践。
本文所有代码已上传到【州的先生资源中心】,有问题欢迎留言讨论
文章版权所有:州的先生博客,转载必须保留出处及原文链接