文章目录
一、种子文件与磁力链接
经常下载各种资源和影视资料的小伙伴对于BT种子应该是不陌生的,通过小小的BT种子,我们可以下载到各种丰富的资源。而磁力链接相较于BT种子,则更加方便,直接通过一串代码式的链接就可以进行资源的下载。从而省去了BT种子的存储。既便于传播,也便于隐藏。
其实BT种子和磁力链接是有相关性的,通过BT种子可以转换为磁力链接,磁力链接也能索引到BT种子中记录的资源。(有关BT下载具体的原理,这里就不做介绍了,有兴趣的小伙伴可以自行搜索相关资料)下面我们通过Python剖析一个种子,来找到BT种子转磁力链接的关键。
我们在某电影资源网站上下载了一个电影《找到你》的BT种子,打开BT种子文件会自动调用迅雷进行识别(如果安装和迅雷软件),其显示了BT种子里面包含的如下图所示的资源:
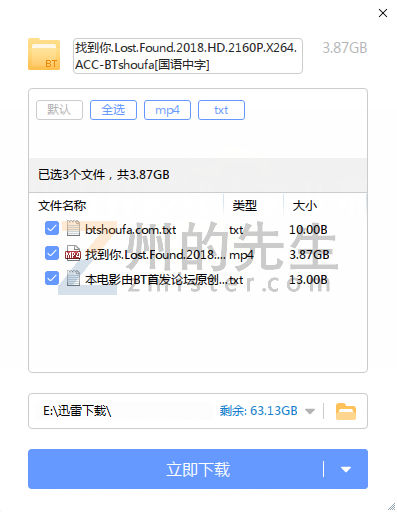
里面有三个文件,其中一个MP4媒体文件,两个文本文件,迅雷是如何通过BT种子定位到这些文件资源的呢?下面我们继续研究。
二、使用Python转换种子文件为磁力链接
在上面,我们从网站上下载了一个电影资源的BT种子,通过迅雷验证了这个BT种子中的资源。下面,我们通过Python来读取一下这个BT种子的内容,看看BT种子中到底有些上面东西。
Python读取BT种子
BT种子是一个文件,当然不是纯的文本文件,所以,我们使用二进制的方式打开并读取它:
with open('找到你.torrent','rb') as f:
    ff = f.read()
    print(ff)
我们运行上述代码,其会通过二进制的方式打开“找到你.torrent”这个BT种子并将文件内容打印出来。结果如下:
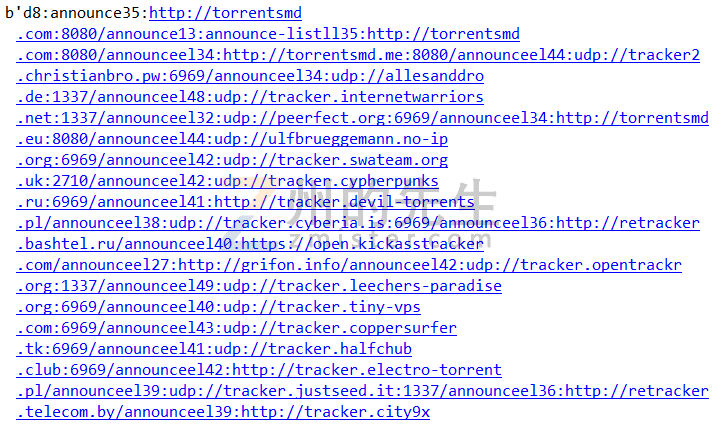
打印出来的内容还是字节流,可以看到一些类似于URL链接的内容,我们使用bcoding模块利用Bencoding编码方式对它进行解码:
from bcoding import bdecode
with open('找到你.torrent','rb') as f:
    # ff = f.read()
    ff = bdecode(f)
    print(ff)
现在,打印出来的内容就是解码之后的BT种子的内容了,文件内容的结构比之前的清晰多了:
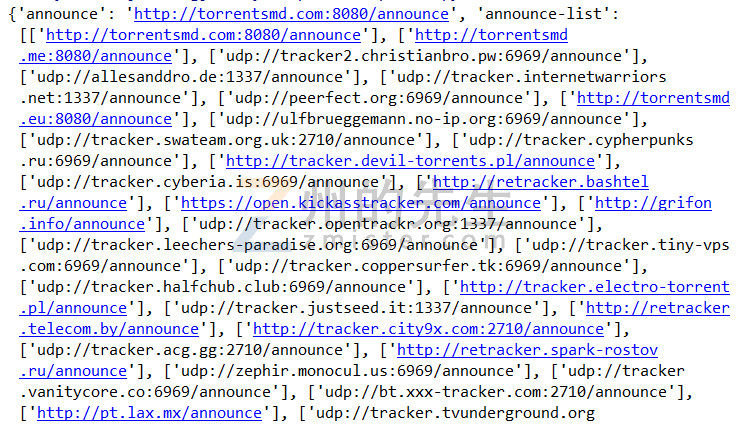
从中可以发现,BT种子解码之后的内容是多个字典的键值对,我们使用字典的items()方法,遍历BT种子的所有键值对内容并打印出来:
from bcoding import bencode,bdecode
with open('找到你.torrent','rb') as f:
    # ff = f.read()
    ff = bdecode(f)
    # print(ff)
    for i,k in ff.items():
        print(i,':',k)
这样呈现出来的结果就更加清晰了:

从中我们进而可以发现,BT种子中的内容分为7大块,分别是:
- announce:表示Tracker的主服务器
- announce-list:表示Tracker的服务器列表;
- created by:表示BT种子通过什么方式进行的创建;
- creation date:表示BT种子创建的时间,为一个时间戳;
- encoding:表示BT种子的编码类型;
- info:表示下载的文件的信息,包括多个子字段,根据下载的是单个文件还是多个文件,子字段的项目会不同;
- nodes:节点的列表。
在这些内容中,我们需要重点关注info中的内容,因为这里面才是BT种子资源的最核心部分。可以发现info还是一个字典,我们继续对其进行遍历:
from bcoding import bencode,bdecode
with open('找到你.torrent','rb') as f:
    ff = bdecode(f)
    for i,k in ff['info'].items():
        print(i,':',k)
这样,我们又得到了BT种子info中的内容:
info里面的内容继续分为了9大块:
- files:表示文件的信息,如果有多个文件,会用列表继续包裹;
- name:推荐的文件夹名称;
- name.utf-8:推荐的文件夹名称的utf-8编码;
- piece length:文件块的大小;
- pieces:文件块的特征信息,是BT种子最核心的字段;
- publisher:发布者;
- publisher-url:发布者的URL链接;
- publisher-url.utf-8:发布者url链接的utf-8编码;
- publisher.utf-8:发布者的utf-8编码;
之前我们通过迅雷打开BT种子,发现其中有3个文件,在此我们可以继续遍历files字段验证一下:
from bcoding import bencode,bdecode
with open('找到你.torrent','rb') as f:
    ff = bdecode(f)
    for i,k in ff['info'].items():
        print(i,':',k)
        if i == 'files':
            for kk in k:
                print(kk)
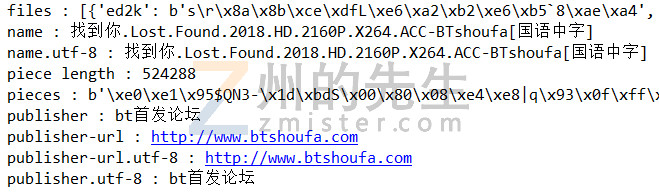
就得到了files字段下的内容:
{'ed2k': b's\r\x8a\x8b\xce\xdfL\xe6\xa2\xb2\xe6\xb5`8\xae\xa4', 'filehash': b'\x87\xea\xd7\x84\xc6D\x16\x0ca\x8c\x03\x06\x05\xde\xdbX\xcd\xf6LF', 'length': 10, 'path': ['btshoufa.com.txt'], 'path.utf-8': ['btshoufa.com.txt']}
{'length': 524278, 'path': ['_____padding_file_0_如果您看到此文件,请升级到BitComet(比特彗星)0.85或以上版本____'], 'path.utf-8': ['_____padding_file_0_如果您看到此文件,请升级到BitComet(比特彗星)0.85或以上版本____']}
{'ed2k': b'\x1a\xdc02\xeb \x9d\xa1\xde\xb4Hh\xb4A\xc9\xc5', 'filehash': b'\x03\xe6\x0cau\xb8x\x1b]3\x1a\x14fY5\xb2#\xf5\xd8\x0b', 'length': 4151889015, 'path': ['找到你.Lost.Found.2018.HD.2160P.X264.ACC-BTshoufa[国语中字].mp4'], 'path.utf-8': ['找到你.Lost.Found.2018.HD.2160P.X264.ACC-BTshoufa[国语中字].mp4']}
{'length': 471945, 'path': ['_____padding_file_1_如果您看到此文件,请升级到BitComet(比特彗星)0.85或以上版本____'], 'path.utf-8': ['_____padding_file_1_如果您看到此文件,请升级到BitComet(比特彗星)0.85或以上版本____']}
{'ed2k': b'-~\xd0h\xce\xdaH\xb8\xec."\xd3xSC\xfb', 'filehash': b'\xf6\x85\x84)j\x11\xbc\xbe\x9c\x14^\xf8G \x98B\xd5v\xb3\xa3', 'length': 13, 'path': ['本电影由BT首发论坛原创压制!.txt'], 'path.utf-8': ['本电影由BT首发论坛原创压制!.txt']}
Python生成磁力链接
在上面,我们对BT种子进行了解剖,其实,要生成BT种子的磁力链接,并不需要对BT种子解析那么多;因为磁力链接是通过文件内容的hash值来寻找文件,所以我们只需要获取到BT种子的info字段就可以了。
一个磁力链接的最基本结构如下所示:
magnet:?xt=urn:btih:D6ZCRFF4EDQLEPW44V7B7VTGRSCSE4K5
其中:
- magnet:表示使用的协议;
- xt:是英文Exact Topic的缩写,表示包含文件Hash值的统一资源名称;
- btih:是英文BitTorrent Info Hash的缩写,表示采用了Hash方法名。btih还可以替换为ed2k、aich、sha1或md5等等 ,它表示的是这个文件唯一的标识符。
此三者,是磁力链接的最基本构造,还有一些注入ws、dn、tr的选填字段用于扩充磁力链接的信息,在此就不做介绍。
基于此,我们对BT种子进行解码获取到其info的内容,然后对其进行Hash加密,就得到了这个BT种子中的资源的磁力链接索引,再对链接进行字符串拼接,也就得到了BT种子的磁力链接。
所以我们使用Python对其的实现代码为:
from bcoding import bencode,bdecode
import hashlib
import base64

with open('找到你.torrent','rb') as f:
    # ff = f.read()
    ff = bdecode(f) # 对种子文件进行解码
    content = ff['info'] # 选择info字段
    hashcontent = bencode(content) # 对info内容进行Bencoding编码
    digest = hashlib.sha1(hashcontent).digest() # 对Bencoding编码后的info内容进行hash加密
    b32hash = base64.b32encode(digest) # 对hash加密后的info内容进行base32编码
    magnet = b32hash.decode()

    magnetUrl = "magnet:?xt=urn:btih:{0}".format(magnet)
    print(magnetUrl)
运行代码,我们就得到了一个磁力链接:
magnet:?xt=urn:btih:D6ZCRFF4EDQLEPW44V7B7VTGRSCSE4K5
我们复制这个磁力链接,到迅雷上测试,和使用BT种子的效果是一样的:

三、使用PyQt5制作种子磁力链接转换图形界面
在通过Python代码实现了BT种子对磁力链接的转换之后,我们就可以使用PyQt5来对这个BT种子转磁力链接程序编写图形用户界面了,不然每次都手动设置种子文件路径怪不方便的。
创建一个基本的图形界面
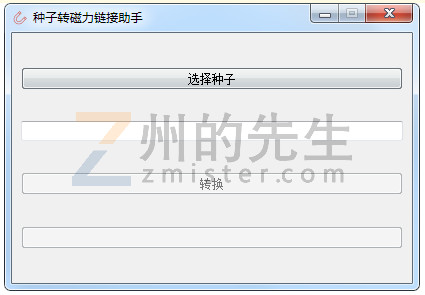
首先来创建一个最基本的图形界面窗口,里面包含3个按钮和1个输入框:
import hashlib
import base64
from bcoding import bencode,bdecode
import traceback
import sys
from PyQt5 import QtCore,QtGui,QtWidgets

class MainUi(QtWidgets.QMainWindow):
    def __init__(self):
        super().__init__()
        self.setWindowTitle("种子转磁力链接助手")
        self.setFixedSize(400,250)
        self.ini_ui()

    def ini_ui(self):
        # 设置图标
        icon = QtGui.QIcon()
        icon.addPixmap(QtGui.QPixmap("icon.png"), QtGui.QIcon.Normal, QtGui.QIcon.Off)
        self.setWindowIcon(icon)

        main_widget = QtWidgets.QWidget()
        main_layout = QtWidgets.QGridLayout()
        main_widget.setLayout(main_layout)
        self.select_file = QtWidgets.QPushButton("选择种子")
        self.file_path = QtWidgets.QLineEdit()
        self.convert_torrent = QtWidgets.QPushButton("转换")
        self.convert_torrent.setEnabled(False)
        self.maginfo_button = QtWidgets.QPushButton("")
        self.maginfo_button.setEnabled(False)

        main_layout.addWidget(self.select_file)
        main_layout.addWidget(self.file_path,)
        main_layout.addWidget(self.convert_torrent,)
        main_layout.addWidget(self.maginfo_button,)

        # 设置窗口主部件
        self.setCentralWidget(main_widget)

def main():
    app = QtWidgets.QApplication(sys.argv)
    gui = MainUi()
    gui.show()
    sys.exit(app.exec_())

if __name__ == '__main__':
    main()
得到我们这个图形界面的形态:
创建种子选择方法
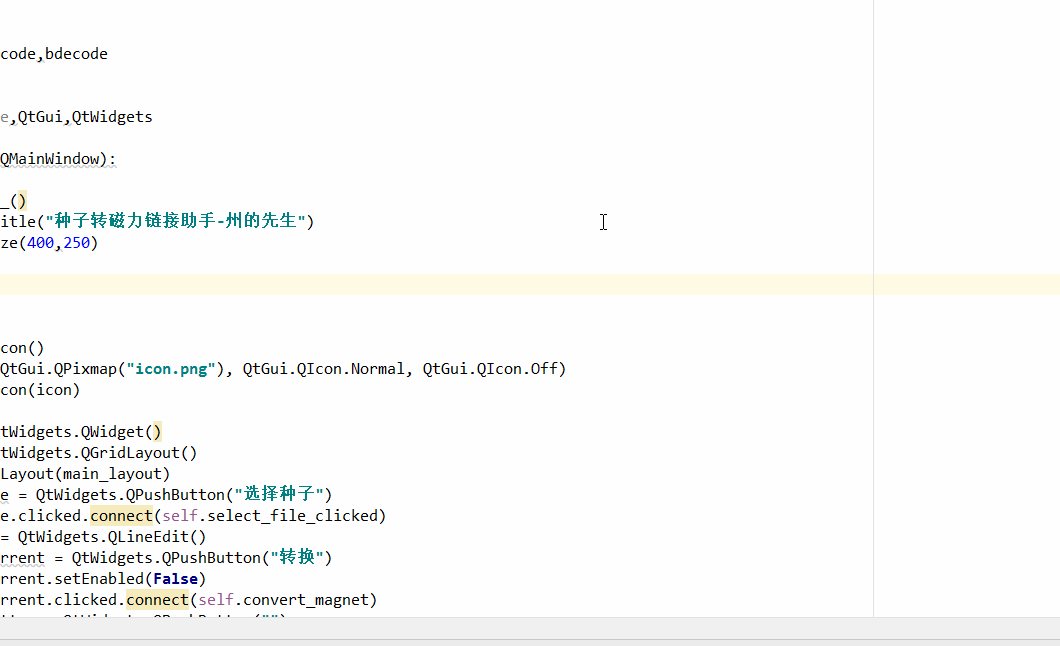
现在我们为MainUi()类创建一个子方法,用来在电脑中选择BT种子文件,并将BT种子的路径程序在文本输入框中,这个功能通过QtWidgets.QFileDialog()来实现:
    # 选择种子文件
    def select_file_clicked(self):
        try:
            self.filename = QtWidgets.QFileDialog.getOpenFileName(self, "OpenFile", ".","种子文件(*.torrent)")[0]
            if len(self.filename):
                self.file_path.setText(self.filename)
                self.convert_torrent.setEnabled(True)
                self.maginfo_button.setEnabled(False)
        except Exception as e:
            print(traceback.print_exc())
然后,将“选择种子”按钮的点击信号链接到这个方法上:
self.select_file.clicked.connect(self.select_file_clicked)
创建转换磁力链接方法
转换磁力链接方法包括了读取BT种子和对info信息进行哈希加密,是这个程序的最核心方法:
    # 转换为磁力链接
    def convert_magnet(self):
        if self.filename:
            with open(self.filename, 'rb') as f:
                # ff = f.read()
                ff = bdecode(f)  # 对种子文件进行解码
                content = ff['info']  # 选择info字段
                hashcontent = bencode(content)  # 对info内容进行Bencoding编码
                digest = hashlib.sha1(hashcontent).digest()  # 对Bencoding编码后的info内容进行hash加密
                b32hash = base64.b32encode(digest)  # 对hash加密后的info内容进行base32编码
                magnet = b32hash.decode()

                self.magnetUrl = "magnet:?xt=urn:btih:{0}".format(magnet)

            self.maginfo_button.setText('转换成功!点此复制')
            self.maginfo_button.setEnabled(True)
然后将“转换”按钮的点击信号链接到这个方法上:
self.convert_torrent.clicked.connect(self.convert_magnet)
创建复制磁力链接方法
磁力链接生成之后,我们需要点击按钮复制到粘贴板上:
    # 复制信息到粘贴板
    def copy_magnet(self):
        clipboard = QtWidgets.QApplication.clipboard() # 实例化一个粘贴板
        clipboard.setText(self.magnetUrl)
        QtWidgets.QMessageBox.information(self,'提示','复制成功')
然后,将“复制”按钮的点击信号链接到这个方法上:
self.maginfo_button.clicked.connect(self.copy_magnet)
测试程序运行:
最终,完整的程序代码如下所示:
import hashlib
import base64
from bcoding import bencode,bdecode
import traceback
import sys
from PyQt5 import QtCore,QtGui,QtWidgets

class MainUi(QtWidgets.QMainWindow):
    def __init__(self):
        super().__init__()
        self.setWindowTitle("种子转磁力链接助手")
        self.setFixedSize(400,250)
        self.ini_ui()

    def ini_ui(self):
        # 设置图标
        icon = QtGui.QIcon()
        icon.addPixmap(QtGui.QPixmap("icon.png"), QtGui.QIcon.Normal, QtGui.QIcon.Off)
        self.setWindowIcon(icon)

        main_widget = QtWidgets.QWidget()
        main_layout = QtWidgets.QGridLayout()
        main_widget.setLayout(main_layout)
        self.select_file = QtWidgets.QPushButton("选择种子")
        self.select_file.clicked.connect(self.select_file_clicked)
        self.file_path = QtWidgets.QLineEdit()
        self.convert_torrent = QtWidgets.QPushButton("转换")
        self.convert_torrent.setEnabled(False)
        self.convert_torrent.clicked.connect(self.convert_magnet)
        self.maginfo_button = QtWidgets.QPushButton("")
        self.maginfo_button.setEnabled(False)
        self.maginfo_button.clicked.connect(self.copy_magnet)

        main_layout.addWidget(self.select_file)
        main_layout.addWidget(self.file_path,)
        main_layout.addWidget(self.convert_torrent,)
        main_layout.addWidget(self.maginfo_button,)

        # 设置窗口主部件
        self.setCentralWidget(main_widget)

    # 选择种子文件
    def select_file_clicked(self):
        try:
            self.filename = QtWidgets.QFileDialog.getOpenFileName(self, "OpenFile", ".","种子文件(*.torrent)")[0]
            if len(self.filename):
                self.file_path.setText(self.filename)
                self.convert_torrent.setEnabled(True)
                self.maginfo_button.setEnabled(False)
        except Exception as e:
            print(traceback.print_exc())

    # 转换为磁力链接
    def convert_magnet(self):
        if self.filename:
            with open(self.filename, 'rb') as f:
                # ff = f.read()
                ff = bdecode(f)  # 对种子文件进行解码
                content = ff['info']  # 选择info字段
                hashcontent = bencode(content)  # 对info内容进行Bencoding编码
                digest = hashlib.sha1(hashcontent).digest()  # 对Bencoding编码后的info内容进行hash加密
                b32hash = base64.b32encode(digest)  # 对hash加密后的info内容进行base32编码
                magnet = b32hash.decode()

                self.magnetUrl = "magnet:?xt=urn:btih:{0}".format(magnet)

            self.maginfo_button.setText('转换成功!点此复制')
            self.maginfo_button.setEnabled(True)

    # 复制信息到粘贴板
    def copy_magnet(self):
        clipboard = QtWidgets.QApplication.clipboard() # 实例化一个粘贴板
        clipboard.setText(self.magnetUrl)
        QtWidgets.QMessageBox.information(self,'提示','复制成功')


def main():
    app = QtWidgets.QApplication(sys.argv)
    gui = MainUi()
    gui.show()
    sys.exit(app.exec_())

if __name__ == '__main__':
    main()
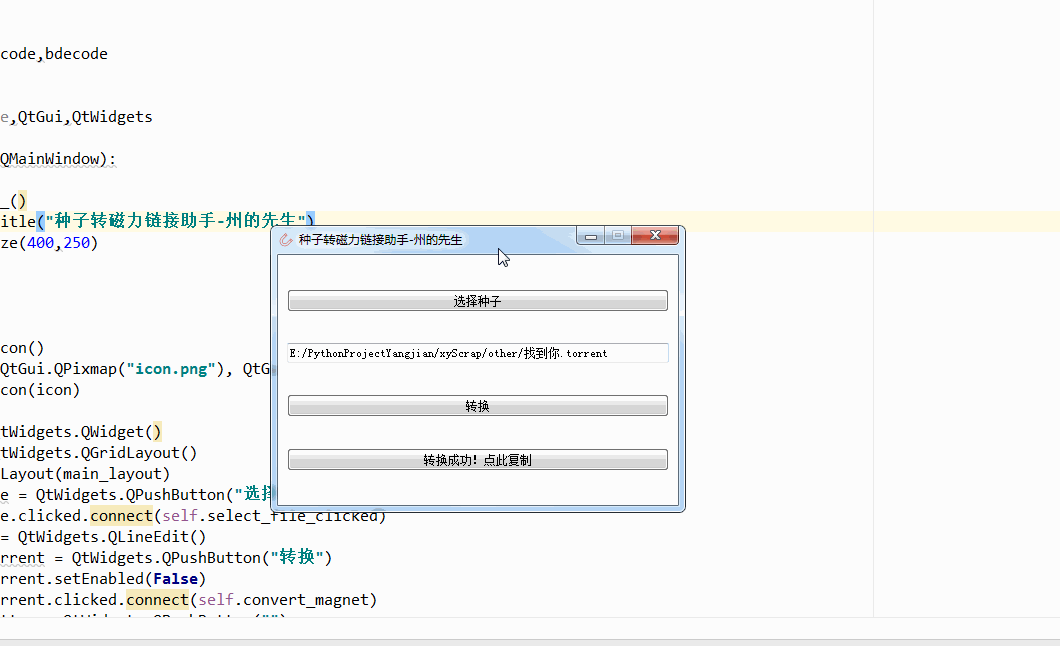
运行代码,我们就可以使用这个图形界面的BT种子转磁力链接工具了:
使用另一个BT种子测试依然成功:
如有疑问,欢迎在知识星球交流!
文章版权所有:州的先生博客,转载必须保留出处及原文链接
写得很好,对照源码还可以一步一步地实现,赞一个